Looking to build a new blog and stuck where to begin?
Then you're in the right place!
Building a new blog from scratch doesn’t have to be difficult. Anyone can develop and design a blog without knowing anything about web development, designing, or coding. If you wish to create a blog for yourself or your business, you can do it easily by using the right tools and resources. I built this blog without having any knowledge of how coding works. Since then I was inspired to put this guide together so that others can benefit from it.
This detailed step by step guide is aimed to help you build your blog from scratch without spending any money on freelancers, agencies, or website builders.
What you really need is a couple of hours of uninterrupted time to follow the guide and set up a blog.
What is a Blog?
As defined by First Site Guide, “A blog (a shortened version of “weblog”) is an online journal or informational website displaying information in reverse chronological order, with the latest posts appearing first, at the top. It is a platform where a writer or a group of writers share their views on an individual subject.”
Difference between a Website and Blog:
Unlike website content, blogs take a more conversational approach to present valuable information to the readers. Here's our Blog as a classic example. We take an in-depth approach to a topic in an interactive tone that keeps the readers hooked on it for a long time.
Another major difference between a website and a blog is that the former is more static in nature, whereas blogs are updated regularly with new content. Since website content is not frequently updated, marketers often take the blogging approach to educate and engage their customers with meaningful and quality content.
Why do you need a Blog?
Whether you are a business owner or have a knack for writing, here are top reasons why you should own have a blog.
- Blogs are a powerful marketing strategy helps build brand awareness while delivering meaningful and relevant content to your audience
- Blogs help drive customer engagement through quality content, strengthening relationships and building trust
- Fresh blog content can give an exceptional boost to your SEO efforts, improving your search engine rankings
- Blog allows owners to educate their target audience and monetize their blogs by creating online resource products and services
- Blogs also allow opportunities for others to share the posts on social media, YouTube etc. which can help drive viral traffic for significant market growth
Step by Step guide to building a New Blog
Step – 1: Choosing the Right Niche for Your Blog
Choosing the right niche is one of the most crucial building blocks of a successful blog. If you select a simple niche with no demand, your blog is likely to go unnoticed. If you choose a high-competition niche, your blog may not cut a mark in the competition. Therefore, you need to pick a niche that caters to your target audience and allows you to monetize easily. Below are the key factors you should consider before deciding your particular niche:
1 - Passion - Find topics that you are genuinely passionate about and structure your blog around it. This will help you avoid monotony and will ensure you have no shortage of ideas or content to share with your audience. You can also use free sources like Quora, Quantcast or Reddit to come up with topic ideas.
2 - Audience - This is the second factor you should consider when finding the right niche of your blog. Building your blog around a targeted audience will ensure you have a constant reader base. Choosing your audience is of utmost importance as it will help your structure your content and keep their attention. For example this blog is structured around making money online. Per the expectation of my audience, all the blog posts are related to generating online income and the tools that go with it. Each blog post is structured to ensure my audience is engaged and happy which will ensure they will keep on coming back for more.
3 - Relevancy - Relevancy is a crucial factor to consider when finding the right niche of your blog. Relevancy means, the niche of your blog should also appeal to other people. If you are passionate about a topic which does not appease to anyone else, it would be difficult to find an audience to bring traffic to your blog. This is common when you have a niche in academics where a particular field of study is highly relatable to you but not much to other people.
4 - Research Potential - Its always beneficial to find a topic which you can research on and value add for your audience. Audiences always love new and challenging topics on a blog. Finding a niche that you can passionately research on would be easy to find new blog post ideas that will keep your audience engaged.
See the below posts for the best ways to choose a profitable blog niche and the top 50 profitable niches for affiliate marketing
Step – 2: Choose a Domain Name
Now that you have your niche finalized, its time to find a catchy blog domain.
The domain name is the name and address of your blog. Visitors use this address when they try to find your site through their web browsers.
The domain name of this blog is mrmoneymagnet.com. Yours can be just about anything. Domain names may cost anywhere from $10 a year to $50 a year. The usual price tag is $15.
Some Quick Tips to Help Choose Domain Name
If you have not registered or selected a domain name for your blog, here are some tips to help:
- If you are creating a blog for your business, your domain name should preferably match your company name — for example, YourCompanyName.com.
- If you plan to set up a personal blog, then YourName.com can be a great option.
- A highly effective way is to also search for creative names around the niche of your blog. For example - we named this blog : Mrmoneymagnet.com cause we wanted the name to resonate the niche of the blog, i.e. make money online.
- Use "standard" domain name extensions such as .com, .net or .org if your audience is international. Use the "local" domain name extensions, like .us, .de, .fr, or .ru, if your goal is to target country visitors.
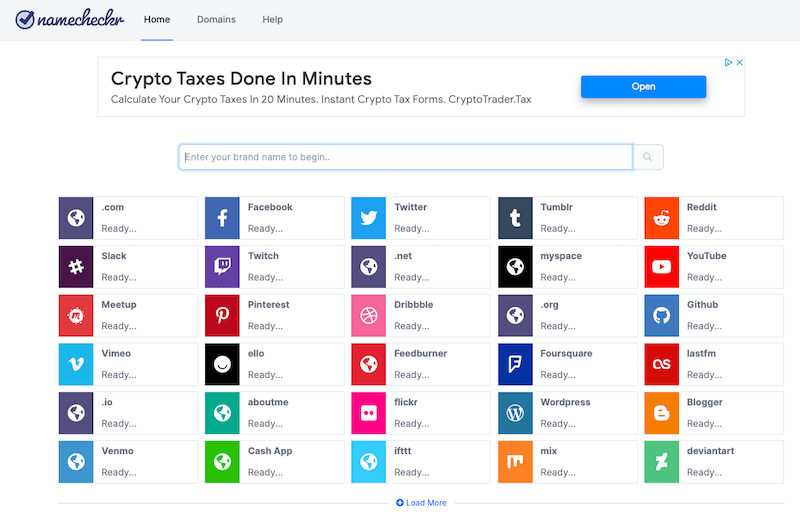
If the domain name of your choice is already taken, don't worry. You have 300 million different registered domain names to choose from, and a billion other possibilities still available. You can use the services of online websites such as Namecheckr.com to come with ideas about your blog name
If you're not using a domain name yet, you don't need to register one. We are going to show you how to get a free domain for a year in the Next Step
Step – 3: Choose a Web Hosting Service
Besides a domain name, you will also need a web hosting service to host your blog.
Web hosting can be defined as a service that hosts and stores your blog content / files on a server that is secure and functional. Your blog cannot be read and browsed by anyone without a web host.
Web hosting for new websites/ blogs is affordable and reliable and usually costs between $3 and $10 a month.
What to look for in a Web Hosting Service?
Whatever web hosting service you sign up for, please ensure that it has the following features:
- Free SSL domain name (for security)
- One-click WordPress installation (free)
- Customized email accounts
- Unlimited/ Unmetered bandwidth (no traffic restrictions)
- Customer support, ideally 24/7 live chat
- A server uptime of 99.94% or higher
- The speed or website “load time,” i.e., how fast the pages load
- Traffic volume the hosting platform supports
- Cost
If you find a website hosting service that offers all of the above, you've probably found the right provider. Click here for our detailed post comparing the top 10 web hosting services.
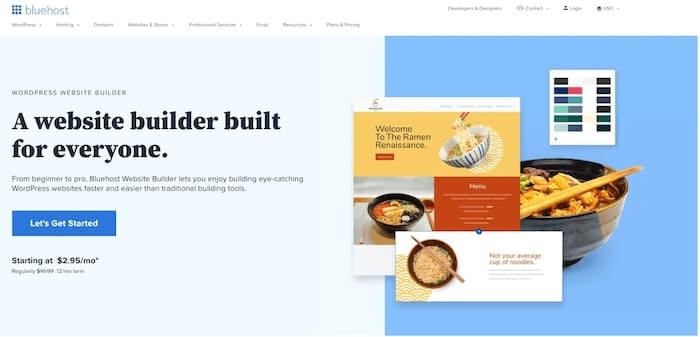
We recommend Bluehost.com for both web hosting and domains as it is affordable and provides all the features mentioned above. Bluehost also provides free domain and domain registration for the first year thus saving time and money.
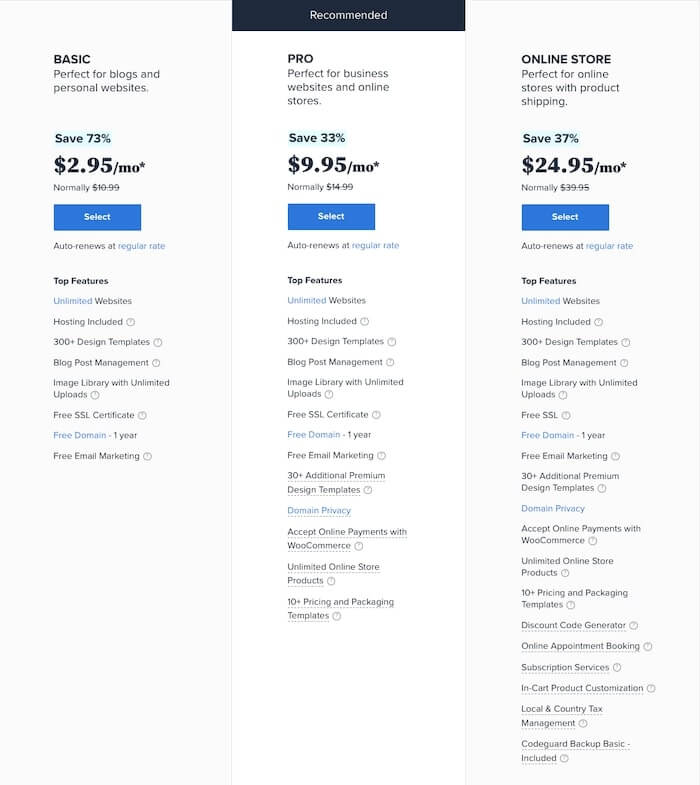
Bluehost hosting plans start at $8.99 / mo ($2.75 / mo with our discount link) and offer all the essential features required to build a new website / blog.
1. To get your web hosting account, simply visit Bluehost.com and click "Get Started".
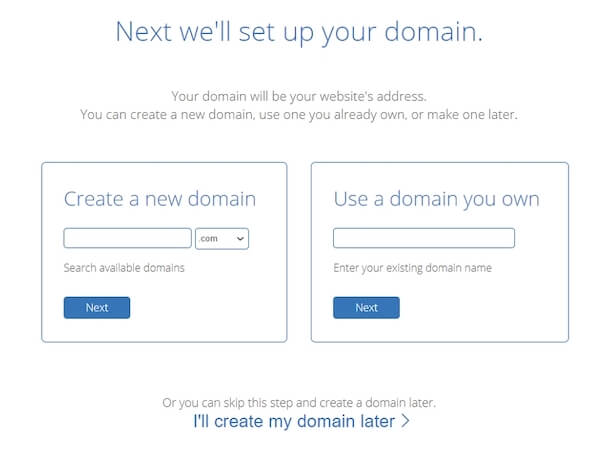
But Keep in Mind - Bluehost does not offer country-specific domain suffixes, such as .us, .de, .fr, or .ru. If you need them, you can buy them separately from Domain.com or GoDaddy.com. If you've got a domain name that you purchased from somewhere else, Bluehost allows you to link it to your new hosting plan. Some additional steps will be needed, such as updating your name servers. There's a Bluehost guide on how to do that.
Step – 4: Install WordPress to build you Blog (Through Webhost)
Once you have your domain name and web hosting ready, you will have to choose and install a web building platform (aka CMS).
We’d recommend WordPress because it's incredibly easy and comes loaded with thousands of free layouts and add-ons that make your blog look more professional and stylish.
Setting up a WordPress blog is easy, and most of the time, your web host does it for you, so you really don't have to do it hands-on.
If you're not using Bluehost as a web host, don't worry about it. Many web hosting services have "WordPress install" sited somewhere on the hosting Panel. If you're dealing with a web host that doesn't provide a 1-click install, try setting up WordPress manually.
For Bluehost users, however, here is how you’d install the website.
Installing a WordPress Website via Bluehost
- Log on to your Bluehost account
- Click "My Sites" and then click "Create Site."


3. Enter the basic information about your website, and WordPress installation will be commence. The process is sequential and happens on its own like autopilot.

4. When the setup is finished, Bluehost will show you the installation and login details. Be sure to keep this information safe somewhere.
All Set! Now test run your Website
Having installed WordPress, the next thing to do is to test if everything works fine. The simplest way to do this is to type your domain name into an internet browser and run the search.
With WordPress installed correctly, what you'll see is a simple website like this:

If it doesn't look too attractive, don't worry, you'll soon learn how to change the design to make it more appealing.
Step – 5: Verify SSL/HTTPS settings
An SSL (Secure Sockets Layer) certificate is a digital certificate that authenticates the identity of a website/ blog and encrypts information sent to the server using SSL technology. Encryption is the process of scrambling data into an undecipherable format that can only be returned to a readable format with the proper decryption key.
In short, an SSL certificate ensures that your website is delivered securely to your visitors. Bluehost automatically adds an SSL whenever you create a new website or install WordPress. To check the status of your SSL, follow the below steps:
- Log in to the Bluehost portal
- Click "My Sites"
- Find your site and click "Manage Site."
- Go to the "Security" tab.
- You can check your "Free SSL Certificate" status under the "Security Certificate."
If all goes well, you should see, a lock icon next to your domain name.
It may take several hours before the SSL is fully set up, but it shouldn't stop you from working on building your blog.
Please note - Enabling SSL makes your blog appealing to Chrome and Google in general. Per the 2018 update, SSL enabled sites gain priority in Google rankings.
Step – 6: Install Plugins / Add-Ons
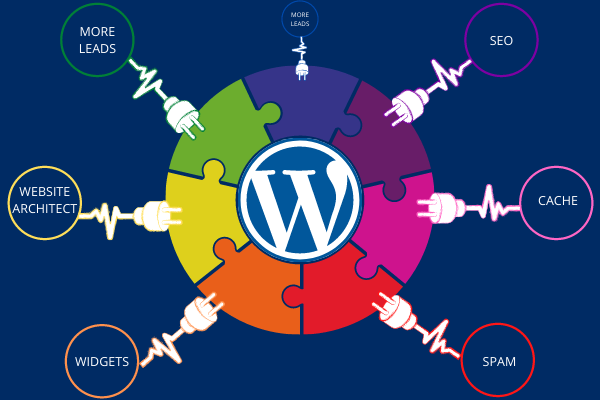
Plugins and widgets are applications that allow you to integrate additional features into your blog to improve its structure and readability. Plugins ensure improved functionality, while widgets serve as supplemental content or design elements. You can use widgets to link to your archived pages and posts for seamless navigation or add media and RSS feed. Widgets come auto integrated with multiple themes and if you are using Thrive Themes, then "Clever Widgets" would come in the package. Read the top 10 plugins for more info.
Plugins are crucial to the basics of a good blog and will help make it more visually attractive, engaging, and easy to edit and read.
Click here for the list of the top 10 plugins you need for your blog
Step – 7: Customize Your Website Design and Structure
Let's start with the fun part!
Now is the time to make your bare blog feel much more like yours by selecting a stylish theme, customizing it, and adding branding elements.
Why Choose a Theme for Website?
Themes make it easier for you to change the look and feel of your blog without having to write HTML and CSS from the start. Themes consist of templates, modules, images, and global content that control the overall design of your blog.
What to Look for In a Theme?
Every theme should have several must-have features. For example, your theme must be responsive so that your site looks the same across all devices. Also, you should avoid using complicated and hard to read fonts that can discourage customers from getting your key message.
The other consideration is to ensure the theme suits well to your business and website/blog needs. For example, you might be looking for a static header or a slideshow header. Or you might need a theme that comes with a front-end builder.
Below are a Few Questions That You Must Consider to find the right theme for your site:
- Do you need a wide range of layouts or just one?
- Do you want a theme with built-in social media widgets or some other features?
- Do you want to install a demo site, or do you want to start from scratch?
- Do you want to buy a theme that has an inbuilt theme builder?
Need Some Inspiration?
Check the elegant and highly customizable Thrive Themes. We strongly recommend Thrive Themes for their loaded repository of slick and stylish themes that are both easy to use and manipulate.
Carefully consider which theme best suits your brand and appeals to your ideal demographic clientele. Another great place to get started is mythemeshop.com. The website offers free themes which have a good functionalities and customizability. You can install a free theme and gradually migrate to a paid version if you so feel the need for it. Click here to read our detailed post on 60+ websites where you can buy affordable themes.
Whatever the platform you choose for themes, take the time to browse the available themes. Many platforms come with a directory of free themes, find themes related to your niche, with a specific layout, and more.
If you are still in doubt, choose something clean with straight lines and a limited amount of text.
Please note: WordPress has free themes that you can get started on. However if you are serious about blogging, I would recommend to use one of the paid themes to maximise your blogs aesthetics and functionalities.
Once you have chosen your theme, its time to move on to the next step.
How to install a Theme?
Go to the admin interface of WordPress. It is available on YOURSITE.com / wp-admin. Sign in with your WordPress installation username and password and follow the steps below.
- Open the sidebar and go to "Themes → Add New."
2. In the search box, type "Name" of the theme of your choice and click "Install."
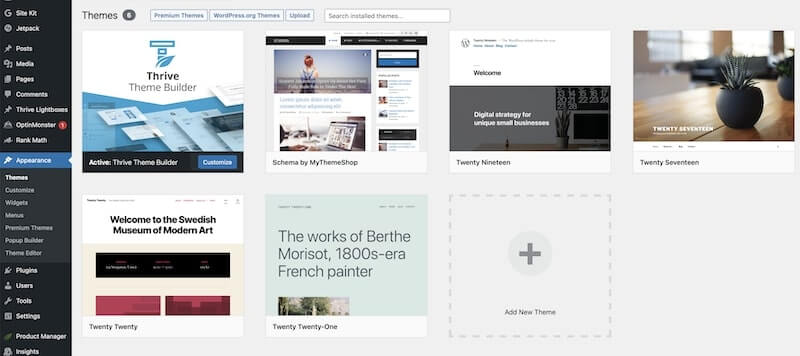

3. After installation, click on the button "Activate," which will appear in place of the "Install" tab.
4. A success message will indicate that the theme has been installed.
If you have bought a theme from a third party vendor, you will get a download link which you can save in your computer and upload to your WordPress website. The activation rules remain the same.
Customize your Theme and Templates
Once you have installed a theme, you can start customizing it. The design and functionality of your blog is your way to convince the audience to take a closer look. It's imperative that your design makes sense to your ideal consumer and works to enhance your content rather than hinder it.
Depending on the platform you used to build your blog, you'll have varying levels of control over the layout of your blog.
On most platforms, you will be able to choose a template and then change the color palette, replace images, insert social media icons, add custom shapes and menus, and change the size, colors, and fonts of the tabs.
On more flexible platforms such as the Thrive Themes, you will be able to modify the global settings of your theme to make site-wide changes. That means you can make changes to your font and other elements in one place, and they will be applied across all pages on your blog.
What we've covered above is going to be enough for you to figure out how to build a new blog that stands out and looks authentic, and there are plenty of more options available.
To see them all, go to "Appearance,” then click “Customize." This will set up the main interface of the Customizer with all its settings and presets.
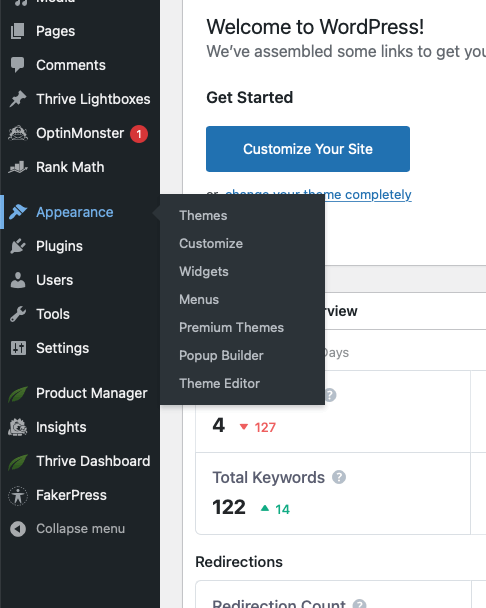
I’ll urge you to scan through what's available and play around with a few of the options. You're probably going to stumble upon some customizations that will come in real handy.
Step – 8: Adding Pages to Your Blog
Similar to web pages, blog ‘pages’ allow you to provide valuable information about you or your blog, that do not need to be updated frequently. Ideally, you should use pages to curate content that isn’t a part of regular blog posting. A page is used to add static content, which you can easily manage, create custom layouts for each page, or add them to the navigation menu.
Here are some blog page ideas for you:
- About Us
- Contact Page
- Privacy Policy / Legal
- Disclaimer
- Start Here
- Terms of Service
Since these pieces of content do not change frequently, these should go on blog pages.
Click here to read more about the essential pages in a website
Your blog's homepage provides you with a strong chance to have a full conversation with your audience. The home page is a quick introduction: "Hey, this is what we do." The "About Us" page goes more profound like "This is who we are."
How to Add Pages to your Website?
While each platform is different, it is usually easy to add and remove pages on any platform you use. Take a closer look at the WordPress process mentioned below.
- Login to your WordPress dashboard.
- Click 'Pages' on the left side of the screen then click 'Add New.'

3. You may add text, insert images, embed graphics, and do any other modifications you want. I highly recommend to install the Plugin Thrive Theme builder and Thrive Architect to make it easier for you
4. Click 'Publish' when you're finished.
Remember! After you've decided which pages you need on your blog, remember to put them to your site's navigation bar (Check the section on "Menu" below). You can rearrange or combine the topics of the page any way you want.
You can get inspiration from your favorite websites within your industry for organizing the navigation bar, and also to decide which pages to include or exclude if you are unsure.
Step – 9: Adding Blog Posts to Your Blog
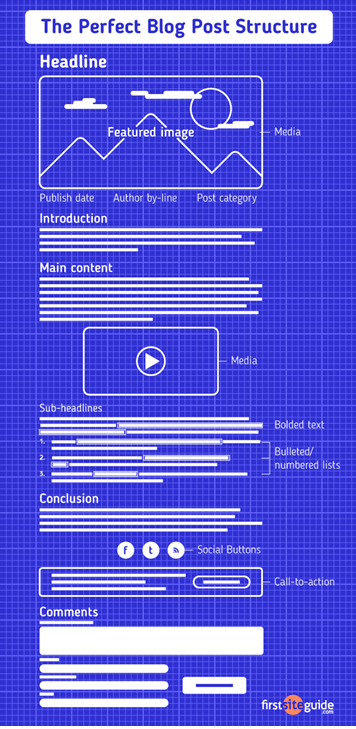
Posts are dynamic content on your blog – including engaging and meaningful information – that you publish and update regularly. These are displayed in reverse chronological order, where the recent post appears at the top of your blog. Unlike pages, posts are meant to be more conversational and also have an in-built comment section that allows your readers to comment on a topic. Additionally, you can integrate social sharing plugins that allow your readers to share the post and make it viral on social networks like Facebook, LinkedIn, Pinterest, Twitter, etc.
Following is the basic structure of a blog post, as suggested by First Site Guide:
- The content of the posts should be around the niche of the website
- The posts should be informative and well written
- Use images and other media to increase the aesthetic appeal of your posts
- Use LSI Keywords to drive organic traffic. Read about LSI keywords here
- Use Internal and external link building. Read about links here
You can read our detailed article on how to structure SEO driven blog posts here.
Alternatively you can also buy articles online. Read about them here
Key differences between Blog Posts and Pages in WordPress.
Given the similar nature of Posts and Pages, there could be some confusion in the minds of new readers. To clarify, below are some of the key differences between Blog Posts and Blog Pages in WordPress.
- Time Stamped - Posts are published at a point in time meaning the content can be time sensitive. Pages do not have a time stamp. The content is timeless.
- Social Sharing - Posts can be socially shared on social media, other blogs. Pages are not shareable.
- Organization - Posts are categorically organized i.e. they are aligned under categories using tags. Pages are not mapped under categories. However there can be child and parent pages.
- Author - Each Post has an author and a published date. Pages are not time or author stamped
- RSS Feed - Posts are included in RSS feed vs. Pages are not.
It is important to note that there are always exceptions to the above. Also you can use plugins to extend and improve the functionality of both content types.
Key similarities between Blog Posts and Pages in WordPress.
Below are some key similarities between Blog Posts and Pages in WordPress.
- Content - Both Posts and Pages are used to publish content. They are both customizable and you can add text, images, forms, etc. to both.
- Necessity - While Pages are necessary for your blog, a blog post is not. Infact, you can build an entire website without ever using posts or blogging features of WordPress. There are many 1 - 2 page business websites which don’t have any section for blogs and they make millions in a year. There are also business website that have a separate section for blogs, new announcement or other supportive articles.
Using the Plugin Thrive Architect and Thrive Theme builder you can create beautiful aesthetically designed content remarkably easy. Below is the tutorial video which explains how to build a high converting website / blog from scratch
Step – 10: Setting up Blog categories
Categories help organize your blog and enable your users to easily find the information they are looking for. It is like a broad topic with more defined, smaller topics that are addressed in the blog. As defined by HubSpot,
“Blog categories organize your site and allow readers to find the information they want. They're high-level topics that make it easy for people to understand what your blog is about and navigate to the content that interests them. Think of it as a table of contents. The categories provide structure to your site by organizing individual posts and sub-topics under several main topics.”
Blog categories play an important role in improving reader engagement by providing easy site navigation for a post. It can significantly boost your SEO, helping search engines to understand what the page is all about and your blog rank likewise. Setting up a category page and continuing linking relevant posts to it will make it simpler for your readers to find the post and also improve optimization.
Here is the step by step guidance on how to set up Categories:
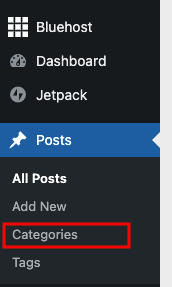
Step 1 - Creating a new Category - Click on Posts --> Categories as shown below
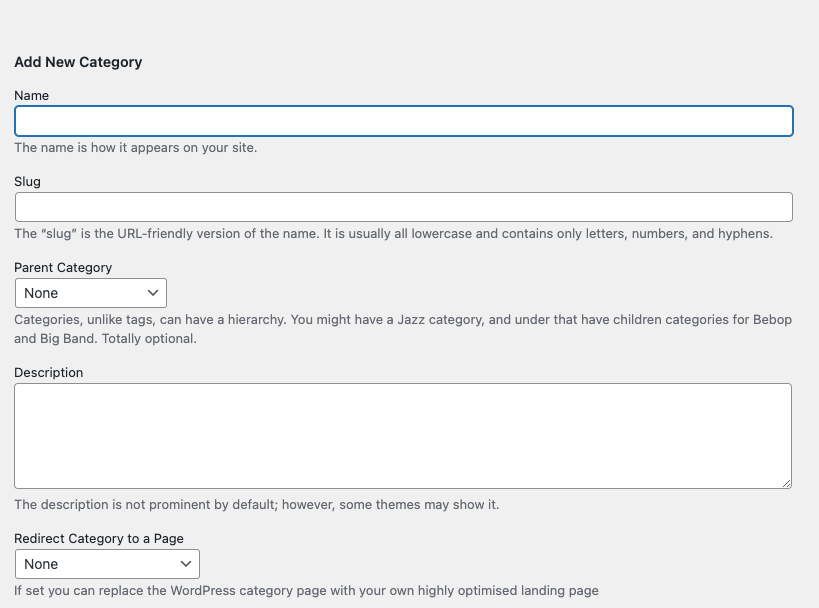
Step 2 - Click on Add New and Enter the Category details . A sample from our blog is shown below
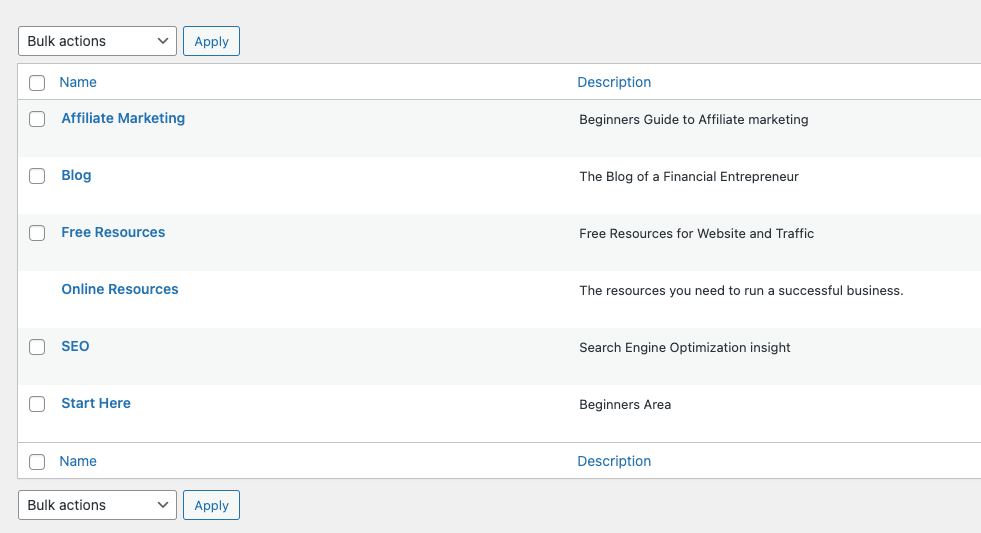
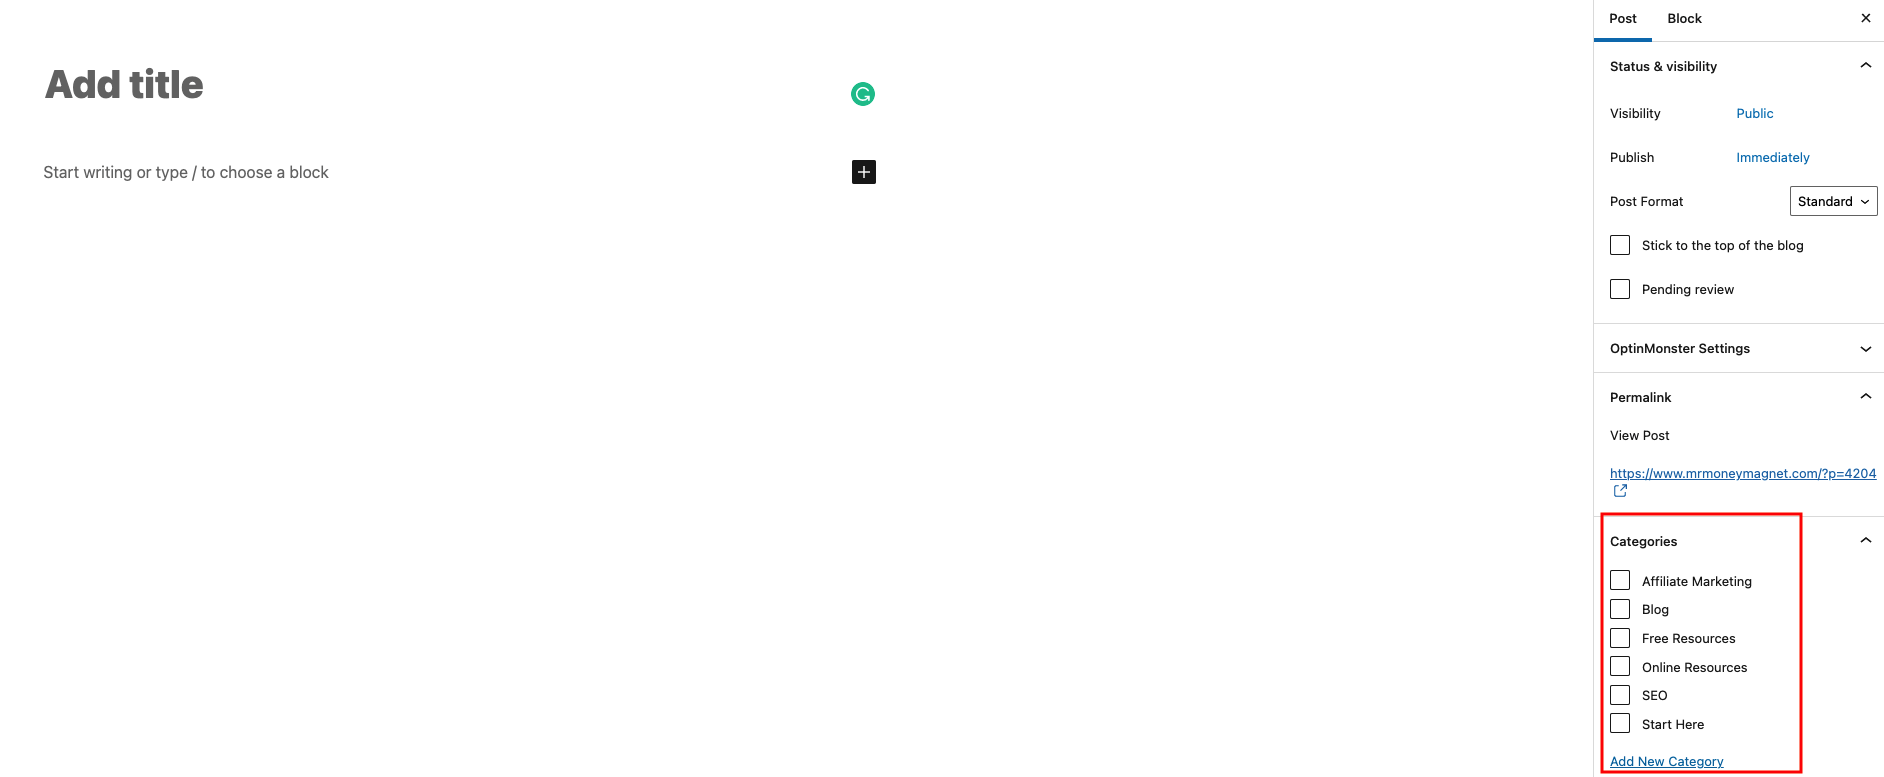
Step 3 - Use the Category to align to categorize your blogs: Now that you have the category ready, you can start using it by mapping your existing posts and new posts to the categories you want to. See snapshot below.
Step – 11: Setting up Blog Menu
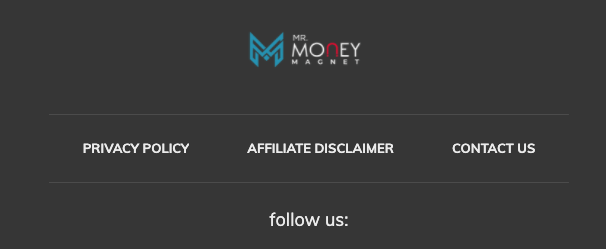
If you run a WordPress blog, it is a good idea to have one or more menus. These serve as a primary source of navigation for your blog. This will help save the time of your readers because they can easily navigate to the right topic/ category they are looking for. You can set the menus at the top (Header) and at the bottom (Footer) of a blog. Here is an example:
Header Menu

Footer Menu
Some of the key principles to follow when setting up your menu are as below:
- Header Menu - This is the most important menu. Ensure to make the menu easily understandable and navigable. A good practice is to use "Categories" as your Menu so it gives the users a view of your Blog categorization
- Footer Menu - This is not as much focused on as Header Menu. You can include disclosures, policies and contact us information here.
Step by step guidance on how to set up Menu:
Step 1 - Creating a New Menu - Go to Appearance --> Menu
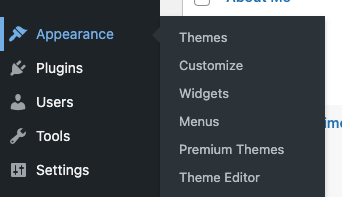
Step 2 - Select the Menu you want to create - Header or Footer

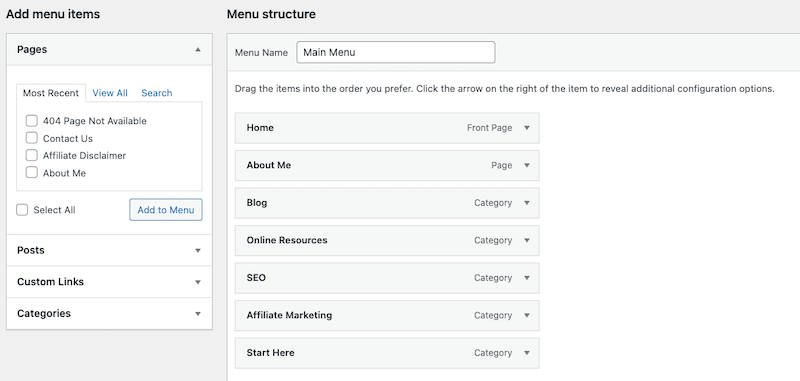
Step 3 - Select what you want to include in your Menu. As an example from this blog we have selected our categories which is visible on the right side of the picture below:
Step - 12: Make Final Checks and Publish!
Your website is now ready to be launched. It's time to let your creativity loose! Check your blog a final makeover and publish it. Note that you can make any changes at any time.
Parting Shot!!
Now that you know how to set up a blog and its key content essentials, its time to get started and create a blog that achieves great results. Its important to remember that the work on your blog is never finished. As your niche evolves, it would be important for you to keep your blog up-to date to keep the attention of your user. You can always seek the services of professional writers who can write the content for you.
Once you have your blog ready and going, its time to focus on traffic. Follow our next 2 blogs in the same "Get Started here" category which will walk through how you can get the traffic organically and through paid advertising.
Creating and maintaining a WordPress blog is very rewarding. Once you have a steady user base, you can monetize your blog through affiliate marketing and Google Adsense. This has the potential to generate substantial passive income.


